- Greentop Lighting
- 778-551-6855
- sales@greentoplighting.com
LED Panel Light 1×2

LED Panel Light 2×4
2012-09-19
LED Panel Light 1×1
2012-09-19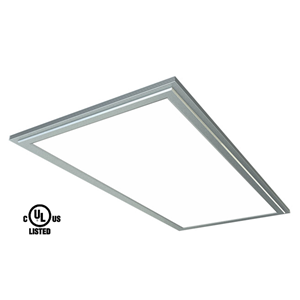
LED Panel Lights work beautifully in any setting. They come in 3 color temperatures to better enhance the atmosphere of any workspace. Because LED Panel Lighting is offered in various sizes, they are suitable for both commercial and residential purposes.
Applications:
Office/Work Space
Walkway Lighting
Decorative Lighting
Description:
| Dimension | 595*295mm/603*300mm |
| LED Driver Input | 100-240VAC, 50/60Hz |
| LED Panel Input | 800mA/18~24VDC |
| Driver Model | Mean Well PLN-20-24 |
| LED Power | 18W |
| Fixture Power | 20W |
| Lumen Output | 1400~1600lm @ 3000K, 1600~1800lm @ 4000, 5700K |
| CCT | 3000K ± 300K, 4000 ± 300K, 5700 ± 300K |
| LED Light Source | SAMSUNG LED SMD5630 |
| CRI | Ra ≥ 80 |
| Power Factor | PF=0.9 @ 75~100% load 115VAC/230VACPF=0.9 @ 85~100% load 277 VAC |
| Certification | cUL Listed |
| Dimmable Function | NA |
 |
 |
Instruction Manual:
- Before installing the lighting fixtures, please read this instruction manual carefully.
- The lighting fixtures should be installed, connected and tested by a certified installer based on regulations.
- Lamps should always be installed or replaced with care.
- Do not use over rated lamp.
- Relamping only can be done when the power is off and the lamp is completely cooled down.
- When a lamp is to be cleaned, switch off the fixture and let it cool down completely. Clean the fixture with a soft cloth and a standard PH neutral detergent. Stainless steel finishing should be maintained regularly.
- Misuse of, or changes to the fixture shall nullify the guarantee.
- Do not cover the fixtures with flammable materials.
- If the external flexible cable or cord of this luminaries is damaged, it should be exclusively exclusively replaced by the manufacturer or his service agent or a similar qualified person in order to avoid a hazard.
- Warning notice: the luminaries shall, under no circumstance, be covered by insulating matting material.
Instillation
Step 1:
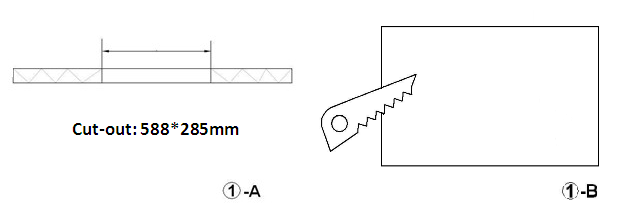
- Cut a hole in the ceiling in the right size for the panel.
Step 2:
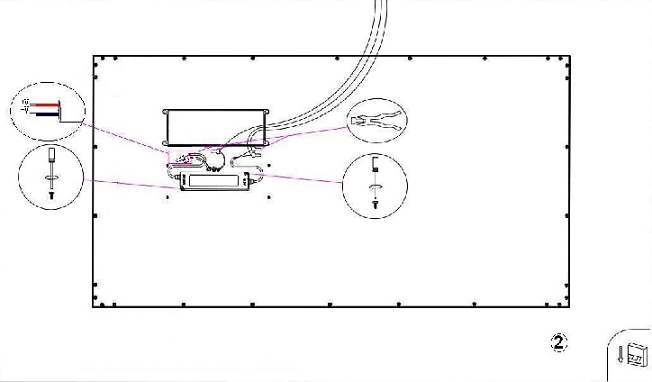
- Switch off the AC power.
- Fix the LED driver onto the back of the panel using the screws provided.
- Insert the AC power conduit into the driver box through the hole on the side of the driver box, and fix the AC power conduit tightly through the hole using suitable wire clamp matching the size of the conduit.
- Connect the DC wires of the LED panel from the back cover to the LED driver DC output end using the connectors provided. Then, connect the AC power cord to the driver AC input end and the ground wire on the back of the panel using the connectors provided. Make sure all connections are firm and correct.
Step 3:
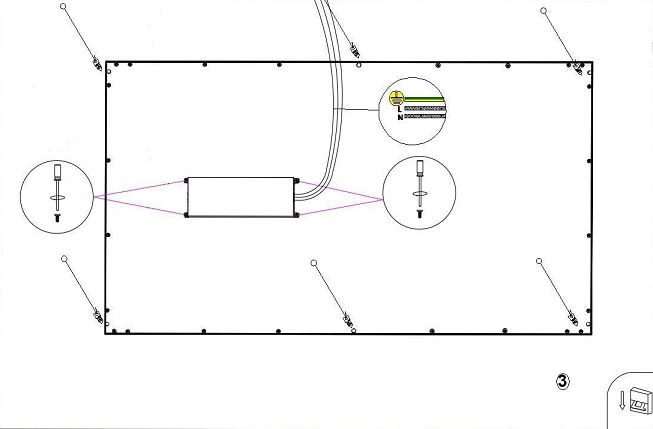
- After connecting the DC and AC wires (and dimming signal wires if applicable), cover the driver with the driver box and fix the driver box onto the screw holes at the back of the panel using the screws provided.
- Unscrew one screw in each corner of the panel, and replace with the provided suspending wires by screwing them securely onto the back of the panel.
Step 4:
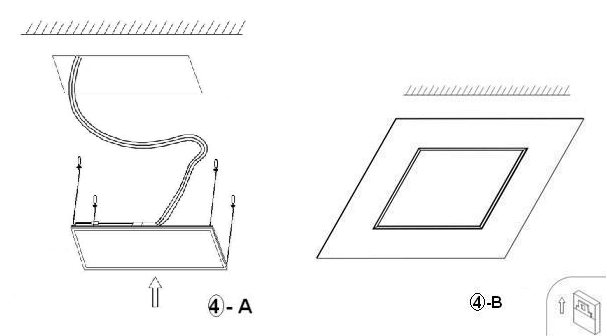
- Install the fixture onto the ceiling by pushing up and placing the fixture into the ceiling opening. Hang the four suspending wires to strong fittings secured to the ceiling slab for extra safety to protect the fixture from dropping.
- Adjust the position of the fixture properly and clean the surface of the panel if required.
- After proper installation of the fixture, switch on the AC power to turn on the panel light.